Access Your Raspberry Pi: SSH Behind Firewall (Windows)
Are you finding it difficult to connect to your Raspberry Pi from afar when it's hidden behind a firewall on a Windows system? You're not alone, and the answer lies in understanding and implementing Secure Shell (SSH), a powerful protocol that grants you remote control, even when facing firewall obstacles.
Many enthusiasts and professionals encounter this frustrating challenge. The typical scenario involves discovering the IP address, attempting a connection via tools like PuTTY, only to be met with the dreaded "access denied" message after entering the correct credentials. But the good news is that overcoming this hurdle is within reach. This comprehensive guide, tailored for those navigating the complexities of network security, will navigate you through the nuances of remotely accessing your Raspberry Pi through SSH, even when a firewall stands in your way, and without the need for cumbersome port forwarding on a Windows system.
Before we dive into the technicalities, it's crucial to recognize the importance of security. Remember that any remote access setup introduces potential vulnerabilities. Always prioritize the implementation of robust security measures to protect your device and network.
Let's begin with a common stumbling block: the initial setup. The Raspberry Pi, in its default state, might not have SSH enabled. This is the cornerstone of remote access, essentially granting you a command-line interface to the Pi from your remote location. To enable SSH, the process is typically straightforward, often accomplished through the Raspberry Pi configuration tools directly on the device, or via a connected monitor and keyboard. Activating SSH is the first, and most crucial, step towards managing your Raspberry Pi remotely.
Once SSH is enabled, the next step is to configure your network environment. This is where the firewall comes into play. Firewalls, designed to protect your network, often block incoming connections. However, SSH provides a workaround. While the specifics will vary depending on your network setup, the overarching principle remains the same: finding a way to bypass or navigate the firewall's restrictions. One common strategy is to utilize SSH tunnels. These tunnels create a secure, encrypted connection through the firewall, allowing you to transmit data and commands as if you were directly connected to the Raspberry Pi.
The elegance of SSH lies in its flexibility and adaptability. Whether you are operating on Ubuntu or Windows, the core principles of remote access remain consistent. Even when dealing with intricate network configurations, the same fundamental concepts can be applied. It might require a bit of tinkering and a deep dive into network settings, but with the proper knowledge, you can conquer the hurdle of accessing your Raspberry Pi from anywhere.
The beauty of SSH is that, once correctly implemented, it will open a world of possibilities. From running commands to managing configurations, SSH makes your Raspberry Pi, and all that it represents, truly accessible. This provides unparalleled flexibility for your projects and applications, opening the door to innovative uses. Whether you are interested in home automation, running a server, or experimenting with IoT devices, SSH will become your best friend.
We must also acknowledge the complexity of network configurations. When it comes to managing #private subnets#, or dealing with the #openvpn client address pool (10.8.0.0\/255.255.255.0)#, specific configurations are required to guarantee the openvpn server can receive the necessary traffic. Understanding and properly configuring these settings is important for a successful, remote connection.
In essence, remotely accessing your Raspberry Pi via SSH behind a firewall isnt as daunting as it may appear. From the initial step of enabling SSH on your Raspberry Pi to implementing techniques like reverse SSH tunnels, the pathways to remote access, even without relying on Windows-specific tools or premium services, are within your grasp. By understanding the principles of SSH, carefully navigating your network configurations, and prioritizing security, youre well on your way to remotely controlling your Raspberry Pi from anywhere.
Remember, the knowledge is at your fingertips. This guide provides the critical tools and insights you need to master remote access. Be patient with the process, embrace the learning curve, and soon, your Raspberry Pi will be ready to take commands from anywhere in the world. Embrace the freedom, and discover the extraordinary possibilities that are within reach.
Let's delve into the essential steps to ensure a smooth and secure remote access experience. Below are the basic building blocks.
1. Enable SSH on Your Raspberry Pi: Begin by enabling the SSH server on your Pi. SSH allows command-line access so you can remotely run linux terminal commands and edit configurations. The easiest way to activate SSH is through the raspberry pi configuration utility.
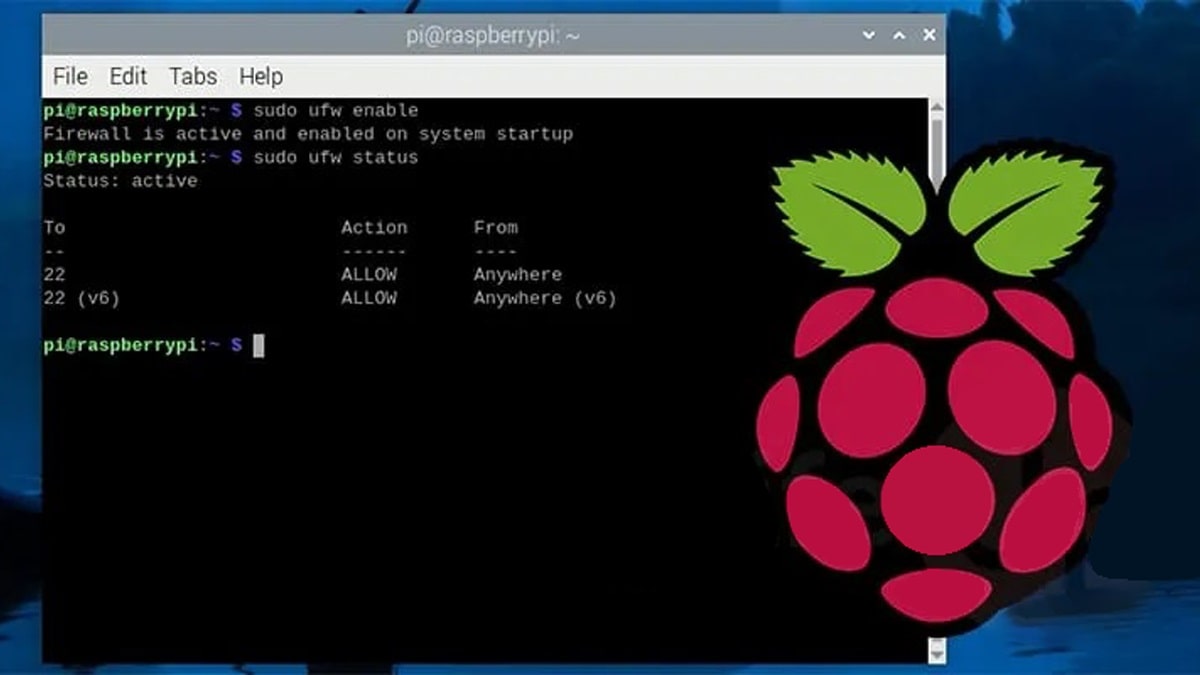
2. Understanding Firewalls and Their Role: Firewalls can often be a hurdle. They are designed to protect your network by controlling incoming and outgoing traffic. The key is to configure the firewall to allow SSH traffic.
3. Implementing SSH Tunnels: SSH tunnels create a secure, encrypted connection through the firewall. This allows data and commands to be transmitted as if you were directly connected to the Raspberry Pi.
4. Reverse SSH Tunnels: Reverse SSH tunnels can be incredibly useful, especially when your Raspberry Pi is behind a firewall with restricted inbound access. This method establishes a tunnel from the Raspberry Pi to a server you control, allowing you to connect back to the Pi from your remote location.
5. Port Forwarding (If Possible): While the focus is on avoiding port forwarding, it is important to understand how it works in case it is an option. Port forwarding directs incoming traffic to your Raspberry Pi, but may require careful configuration of your router.
6. Security Best Practices: Implement strong passwords, update your Raspberry Pi regularly, and consider using key-based authentication instead of passwords for enhanced security.
7. Troubleshooting Common Issues: When problems occur, check the SSH server logs, verify the network connection, and carefully review your firewall settings.
8. Consider alternatives: While this guide focuses on SSH, explore alternatives such as virtual private networks (VPNs) for more secure remote access.
9. The role of #private subnets#: When dealing with private subnets, configure them accordingly to ensure they route traffic correctly to your Raspberry Pi.
10. Using openvpn client # address pool (10.8.0.0\/255.255.255.0)#: When working with openvpn, configure this correctly to allow traffic back to the openvpn server.
By following these steps, you'll be able to overcome the challenge of accessing your Raspberry Pi remotely, even when it's behind a firewall on a Windows system.

